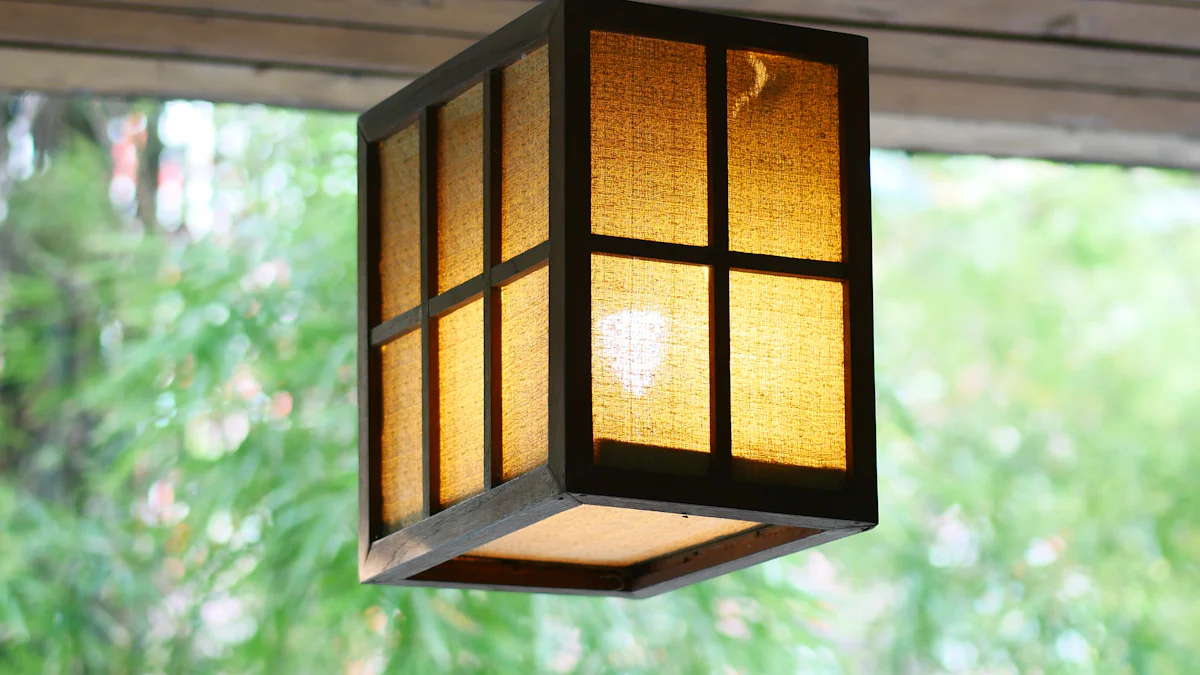
How to Install Waterproof Outdoor Ceiling Lights: Tips & Tricks

Enhancing outdoor spaces with waterproof outdoor ceiling lights led is not just about aesthetics; it's a crucial step in ensuring safety and energy efficiency. The installation process may seem daunting, but with the right guidance, it can be a rewarding experience. Today, we delve into the world of outdoor lighting, shedding light on the importance of weatherproof fixtures and providing valuable insights into the installation journey. Stay tuned for expert tips and tricks to illuminate your surroundings with brilliance! And don't miss out on our recommendation for LED outdoor light solutions from Lhotse to elevate your outdoor lighting game.
Preparing for Installation
Gathering Necessary Tools
To embark on the installation journey of waterproof outdoor ceiling lights, one must first gather the essential tools required for a seamless process. The tools list includes items that are fundamental to ensuring a successful installation and safety throughout the project.
Tools List
Screwdriver: A versatile tool needed for various tasks such as securing fixtures and adjusting mounting blocks.
Wire Strippers: Essential for preparing wires before connecting them to the electrical system.
Ladder: To reach elevated areas where the ceiling lights will be installed securely.
Drill with Bits: For creating holes in the ceiling or walls to accommodate wiring and fixtures.
Voltage Tester: Crucial for checking if the power is off before starting any electrical work.
Safety Gear
Safety should always be a top priority when working with electrical components and installing outdoor lighting fixtures. Equipping oneself with the necessary safety gear ensures protection against potential hazards and promotes a secure working environment.
Safety Glasses: Shield your eyes from debris, dust, or any particles that may fall during installation.
Work Gloves: Provide hand protection while handling tools, fixtures, and wiring to prevent injuries.
Non-Slip Shoes: Ensure stability on ladders or uneven surfaces to avoid slips or falls.
Headlamp: Illuminate dark areas during installation for better visibility and precision in work.
Protective Clothing: Wear appropriate attire to safeguard against cuts, scratches, or exposure to dirt.
Choosing the Right Location
Selecting an optimal location for installing waterproof outdoor ceiling lights is crucial for both functionality and aesthetics. By considering different placement options, one can maximize illumination efficiency while enhancing the overall appeal of the outdoor space.
Under Eaves
Placing ceiling lights under eaves offers several advantages in terms of protection from direct exposure to harsh weather conditions like rain or snow. This positioning not only shields the fixtures but also contributes to prolonging their lifespan by minimizing contact with moisture.
Sheltered Areas
Opting for sheltered areas such as covered patios or alcoves provides additional protection against environmental elements like wind or excessive sunlight exposure. Installing ceiling lights in these locations ensures longevity and sustained performance by reducing their vulnerability to external factors.
Understanding Electrical Requirements
Before commencing the installation process, it is imperative to grasp the electrical requirements specific to outdoor lighting systems. By familiarizing oneself with low voltage fittings and transformer placement guidelines, one can ensure a safe and efficient setup that adheres to industry standards.
Low Voltage Fittings
Utilizing low voltage fittings for outdoor ceiling lights not only enhances energy efficiency but also minimizes potential risks associated with high voltage systems. These fittings are designed to operate at lower power levels, reducing electricity consumption without compromising on illumination quality.
Transformer Placement
Proper placement of transformers plays a vital role in maintaining electrical safety and functionality within an outdoor lighting setup. Placing transformers indoors or in protected enclosures safeguards them from environmental factors while facilitating convenient access for maintenance purposes.
By meticulously preparing with the right tools, selecting optimal installation locations, and understanding electrical prerequisites, individuals can lay a solid foundation for a successful venture into installing waterproof outdoor ceiling lights effectively and safely.
Installing the Lights

When it comes to installing waterproof outdoor ceiling lights led, the process involves mounting the fixtures securely, wiring them correctly, and testing the installation to ensure everything functions as intended. Let's dive into each step to guide you through this illuminating journey.
Mounting the Fixture
To begin, using mounting blocks is a reliable method to ensure a stable and secure attachment of your outdoor ceiling lights. These blocks serve as a sturdy foundation for the fixtures, preventing any movement or misalignment that could compromise their effectiveness. By anchoring the lights with precision using mounting blocks, you can enhance both the aesthetics and functionality of your outdoor lighting setup.
Next, securing the fixture in place is essential to maintain its position and prevent any potential hazards. Whether you are installing a flush mount or pendant light, securing it firmly ensures that it remains intact even during adverse weather conditions. By following manufacturer guidelines and using appropriate tools, you can achieve a professional and durable installation that withstands the test of time.
Wiring the Lights
When it comes to waterproof wire connectors, these components play a crucial role in safeguarding your electrical connections from moisture and environmental factors. By utilizing high-quality waterproof wire connectors, you can create reliable and long-lasting electrical joints that protect against corrosion and water ingress. Ensuring a watertight seal with these connectors is paramount to maintaining the integrity of your outdoor lighting system.
Additionally, electrical tape wrapping provides an extra layer of protection for your wiring connections, further enhancing their durability and resilience. By carefully wrapping exposed wires with electrical tape, you can shield them from external elements and minimize the risk of short circuits or damage. This simple yet effective technique adds an additional level of security to your installation, ensuring safe operation for years to come.
Testing the Installation
Once you have completed mounting and wiring your outdoor ceiling lights, it's time to power on the system and verify that everything functions correctly. Activating the lights allows you to assess their brightness, coverage, and overall performance in real-world conditions. By conducting this initial test, you can identify any issues or discrepancies that may require adjustment before finalizing the installation.
Subsequently, checking for issues ensures that your outdoor lighting system operates flawlessly without any underlying problems. Inspecting all connections, fixtures, and components enables you to detect any loose fittings, faulty wiring, or irregularities that could impact performance. Addressing these issues promptly guarantees optimal functionality and longevity for your waterproof outdoor ceiling lights.
Weatherproofing Tips

Sealing the Fixtures
Using Gaskets and O-rings
To ensure the longevity and performance of your outdoor ceiling lights, employing gaskets and O-rings is a smart choice. These small but mighty components act as protective barriers against moisture infiltration, safeguarding your fixtures from potential damage. By creating a tight seal around the light fixture, gaskets and O-rings prevent water from seeping into sensitive electrical components, enhancing the overall durability of your outdoor lighting setup.
When installing your ceiling lights, gaskets serve as flexible seals that fit snugly between surfaces to block out any external elements. Their pliable nature allows them to conform to irregularities in the fixture's structure, ensuring a watertight enclosure that shields against rain, snow, or humidity. On the other hand, O-rings provide a circular sealing solution that prevents water ingress by forming a secure barrier around connectors or joints. Their simple yet effective design offers reliable protection against environmental factors, maintaining the integrity of your outdoor lighting system.
Incorporating gaskets and O-rings into your installation process adds an extra layer of defense against moisture intrusion, prolonging the lifespan of your waterproof outdoor ceiling lights while upholding their functionality in various weather conditions.
Ensuring All Seals Are Intact
After sealing your fixtures with gaskets and O-rings, it is essential to conduct regular checks to verify the integrity of these protective seals. Inspecting all connections and enclosures ensures that no gaps or damages compromise the effectiveness of the seals. By confirming that all seals are intact and properly positioned, you can proactively address any issues before they escalate into more significant problems.
Regular maintenance plays a crucial role in preserving the weatherproofing capabilities of your outdoor ceiling lights. Over time, exposure to external elements may wear down seals or cause them to deteriorate. By routinely examining and replacing damaged gaskets or O-rings, you can uphold the protective barrier around your fixtures and sustain their resistance to moisture infiltration.
By prioritizing the maintenance of these essential components, you can fortify the weatherproofing of your outdoor ceiling lights and ensure their continued performance in challenging outdoor environments.
Protecting Against Elements
Minimizing Exposure to Rain
Shielding your outdoor ceiling lights from excessive rain exposure is key to preventing water-related damage and maintaining their operational efficiency. Positioning fixtures strategically in areas where direct rainfall is minimized helps reduce the risk of water ingress and prolongs the lifespan of your lighting system. By selecting sheltered locations or installing protective covers over vulnerable fixtures, you can mitigate the effects of rain on your outdoor lighting setup.
Minimizing exposure to rain not only safeguards your fixtures but also contributes to energy conservation by reducing unnecessary power consumption due to water-induced malfunctions. This proactive approach not only enhances the longevity of your outdoor ceiling lights but also promotes sustainable practices in outdoor lighting design.
Shielding from Sunlight
While sunlight is essential for illuminating outdoor spaces during daylight hours, prolonged exposure can impact the durability and performance of your ceiling lights over time. Shielding fixtures from direct sunlight helps prevent discoloration or deterioration caused by UV radiation, preserving their aesthetic appeal and functional quality.
Strategic placement under eaves or within shaded areas minimizes direct sunlight exposure on fixtures without compromising illumination levels. Additionally, utilizing UV-resistant materials for fixture construction enhances their resilience against sun-induced degradation, ensuring long-lasting performance in sunny environments.
By implementing measures to shield your outdoor ceiling lights from excessive sunlight exposure, you can extend their lifespan and maintain optimal functionality for years to come.
Maintenance Tips
Regular Inspections
Conducting routine inspections on your outdoor ceiling lights is vital for identifying potential issues early on and addressing them promptly. Regular checks allow you to assess the condition of fixtures, wiring connections, and weatherproof seals for signs of wear or damage. By detecting any anomalies during inspections, you can take corrective action before minor problems escalate into major repairs.
During inspections...
Examine all visible components for signs of corrosion or rust.
Test each light fixture individually to ensure proper functionality.
Verify that gaskets and O-rings are intact and securely sealed.
Clean any debris or dirt accumulation on surfaces for optimal performance.
Document inspection findings for future reference and maintenance planning purposes.
By incorporating regular inspections into your maintenance routine...
Maintaining cleanliness...
Recapping the seamless installation journey of waterproof outdoor ceiling lights led, one realizes the significance of meticulous preparation and precise execution. Emphasizing the critical role of weatherproofing in safeguarding fixtures against external elements highlights the longevity and efficiency of outdoor lighting systems. Encouraging the adoption of Lhotse LED flood lights for their exceptional energy efficiency and robust durability ensures a sustainable and bright future for your outdoor spaces.
See Also
Best Advice for Attaching Work Light Fixtures
Complete Manual for Purchasing Bendable LED Work Lights
Advantages of Hanging LED Workshop Lights
Comparison of Flexible Workshop Lights: Magnet vs. Clamp?
Best 10 Camping Flashlights of 2024, Reviewed by Professionals
